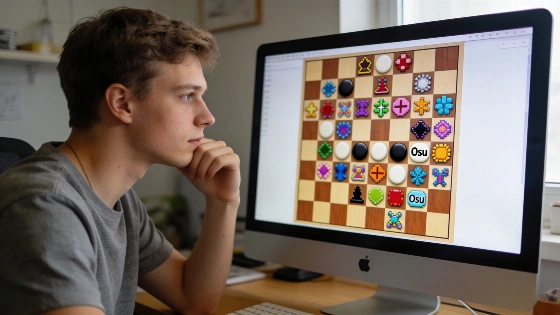
Sorting through the visuals of an Osu skin means opening a large number of PNG files one by one. File browsers often show transparent images on white, which hides subtle flaws or missing pieces. A contact sheet—one image that tiles every sprite on a checkerboard background—gives a much clearer snapshot for creators and reviewers. This method helps digital artists and students working with image processing, since it puts batch image handling and visual quality checks into practice.
Why Use a Contact Sheet for Osu Skins?
Osu skins are folders of PNG images that shape the game's interface. These folders hold both standard and high-resolution (@2x) files. Checking each file for transparency and size by hand is slow and mistakes slip through. A contact sheet puts all elements together, so missing @2x files, odd sizes, or halos around sprites stand out. Technical advice stresses that PNG transparency needs to be checked by image mode and alpha channel, not just the .png extension, since a PNG might be RGB, RGBA, or palette-based with transparency info. Converting images to RGBA makes opacity clear for each pixel, which matters for reviewing on a checkerboard background.
How the Python Script Works
The script uses Pillow to scan a skin folder, pick every PNG that isn't an @2x variant, and tile them on a checkerboard background. For each sprite, it uses the @2x version if it exists, so you see the higher-res image. The script checks that each @2x file is exactly twice the size of its standard version and flags any mismatches or missing files. Compositing uses alpha-aware steps to keep transparent regions when layering sprites over the checkerboard, following best practices for image compositing in Python. Technical docs note that Image.alpha_composite keeps transparent regions when layering PNGs, which is key for showing the intended look between sprites and background.
#!/usr/bin/env python3
"""contact_sheet.py SKIN_DIR OUT.png - tile every PNG in an osu! skin folder."""
import sys
from pathlib import Path
from PIL import Image, ImageDraw

CELL, LABEL, COLS = 160, 18, 8

def checker(w, h, s=10):
    img = Image.new("RGB", (w, h), (200, 200, 200))
    d = ImageDraw.Draw(img)
    for y in range(0, h, s):
        for x in range(0, w, s):
            if (x // s + y // s) % 2:
                d.rectangle([x, y, x + s - 1, y + s - 1], fill=(160, 160, 160))
    return img

def main(skin, out):
    files = sorted(p for p in Path(skin).glob("*.png") if "@2x" not in p.stem)
    rows = (len(files) + COLS - 1) // COLS
    sheet = Image.new("RGB", (COLS * CELL, rows * (CELL + LABEL)), (30, 30, 30))
    draw = ImageDraw.Draw(sheet)
    problems = []
    for i, p in enumerate(files):
        hd = p.with_name(p.stem + "@2x.png")
        src = hd if hd.exists() else p
        im = Image.open(src).convert("RGBA")
        if hd.exists():
            sd = Image.open(p)
            if (sd.width * 2, sd.height * 2) != im.size:
                problems.append(f"{p.name}: @2x is {im.size}, SD is {sd.size}")
        else:
            problems.append(f"{p.name}: no @2x version")
        im.thumbnail((CELL - 8, CELL - 8))
        x, y = (i % COLS) * CELL, (i // COLS) * (CELL + LABEL)
        cell = checker(CELL, CELL)
        cell.paste(im, ((CELL - im.width) // 2, (CELL - im.height) // 2), im)
        sheet.paste(cell, (x, y))
        draw.text((x + 4, y + CELL + 2), p.stem[:22], fill=(240, 240, 240))
    sheet.save(out)
    print("\n".join(problems) or "no size problems found")

if __name__ == "__main__":
    main(sys.argv[1], sys.argv[2])
To run the script, install Pillow with pip install pillow. Then launch it from your terminal, giving the path to your Osu skin folder and the output image you want:
python3 contact_sheet.py "$HOME/osu!/Skins/My Skin" sheet.png
What the Script Delivers
- Checkerboard background: Transparent and semi-transparent pixels show up, so faint glows and halos are easy to catch. This works by compositing each sprite onto an RGBA checkerboard canvas, which reveals transparent edges or assets that were flattened by mistake.
- One cell per element: The script uses the @2x image if it's there, so you review the version most players see on high-res screens. The process keeps transparency until each sprite is placed on the checkerboard cell, following batch image processing best practices.
- Size and completeness report: Each @2x file should be exactly twice the size of its standard version. The script lists every mismatch and missing @2x file, helping skin creators with quality checks.
Ideas for Customization
- Group cells by prefix (like hit, slider, spinner, score-, mania) to keep related sprites together.
- Read skin.ini and show combo colors as swatches at the top of the sheet.
- Skip animation frames after -0 or put each animation sequence on its own row.
- Flag files above a set size (for example, 1 MB) as possible compression targets.
Practical Benefits for Skin Creators
Contact sheets let Osu skin creators quickly check if their designs are visually consistent and complete. Instead of opening files one by one, you see every sprite at once, which makes it easier to catch issues before sharing or releasing a skin. For those interested in more Python scripts for image work, the earlier breakdown on shrinking scanned PDFs with Python shows another way to automate repetitive visual tasks.
For a wide selection of finished Osu skins and gameplay screenshots, the osuskins.org skin library is a handy resource. The osuskins.org skin making notes also list the element names this script will tile, so you know which files to include in your own skin projects.
Educators and learners working on digital skills can use this script as a hands-on example of batch image processing, transparency handling, and visual QA. The script shows how to convert PNGs with alpha channels to RGBA and keep transparency in the output, as recommended in Python image processing guides. This method also matters when resizing sprites, since transparent edge pixels can affect how the resized image looks. Using premultiplied-alpha during crop or resize helps prevent invisible pixel colors from bleeding into resized edges, which supports accurate results in creative and educational projects.