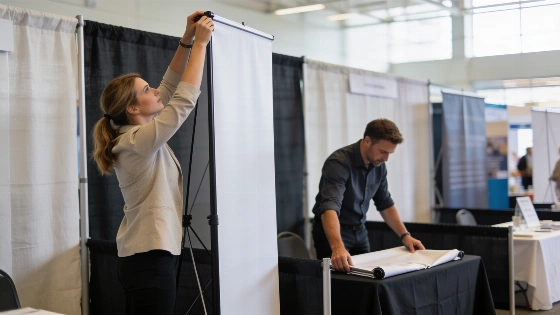
Trade show banners shape how your booth draws attention and deliver your message to people moving through the aisles. Whether you’re new to exhibiting or aiming to boost your booth’s presence, knowing the differences in banner types, sizing, materials, and design helps you present your brand effectively and follow event rules. Freeman, a major event services provider, states that “Trade show graphics help showcase your brand and make it easier for attendees to understand who you are and what you offer.” Banners and graphics remain essential for both newcomers and experienced exhibitors, supporting brand visibility and product displays while guiding visitors and creating immersive spaces (Freeman, Trade Show Graphics).
Where Trade Show Banners Fit in Booth Design
Banners are usually the first display item exhibitors buy. Their portability and fast setup work for many booth sizes, from small local tabletops to larger island spaces. Freeman points out that banners are just one part of a booth system, which can also include backwalls, towers, counters, demo stations, product displays, floor graphics, and hanging signs. Banner choices should match booth goals, budget, and the physical show environment, rather than following a standard formula. Still, banners often end up with too much text or key details placed too low, which hurts their impact. Clear messaging and smart placement help your booth get noticed and communicate your value quickly.
Types of Trade Show Banners
Different banner types suit various booth layouts and budgets:
- Retractable or roll-up banner: A printed graphic rolls into a base and extends upward on a pole. This option fits most booth sizes and is often the first banner exhibitors choose.
- X-banner or L-banner: A lightweight frame keeps the graphic flat. These work well for short events or for lobbies and registration areas.
- Tension fabric display: Stretch fabric covers a tube frame, creating a smooth, wrinkle-free backdrop that packs down for easy transport.
- Hanging banner: Suspended from the ceiling, these fabric signs help island or peninsula booths stand out across the hall. Freeman highlights hanging signs as a visibility tool, especially for booths that need to be seen above crowds and from different aisles. Using hanging signs depends on venue rules, ceiling height, rigging approval, and labor needs.
- Table banner or runner: A fabric strip displayed across the front of a draped table or as a tabletop roll-up, good for small booths and tabletop shows.
- Table throw: A fitted or draped table cover printed with your logo, which can also hide storage under the table.
- Step-and-repeat backdrop: A backdrop with a repeated logo pattern, often used for photos, media walls, or sponsor activations.
- Pipe-and-drape banner: Attached to the booth’s back rail or drape, this works for booths using show-supplied draping as the back wall.
Banner Sizes and Material Choices
Banner sizes differ by manufacturer, but some common standards are:
- Standard retractable banners: about 33 inches wide and 80 inches tall.
- Wide retractable banners: usually 47 to 48 inches wide.
- Tabletop retractables: sized for 6 or 8 foot tables.
- X-banners: around 24 inches by 63 inches.
- Table throws: made for 6 or 8 foot tables.
- Step-and-repeat backdrops: often 8 feet wide or more.
- Hanging banners: available in different shapes and sizes to fit booth needs.
Material choice affects both look and function. Vinyl banners are bright and tough but can reflect overhead lights, causing glare. Fabric banners have a matte finish with little glare, are lighter, and fold without leaving permanent creases. Fabric is often used for tension displays, hanging signs, and table throws. Freeman also suggests backlit displays to make colors, images, and messages stand out on a busy show floor, helping your booth get noticed in crowded settings.
Designing for Readability and Impact
Good banner design makes your message visible from the aisle and easy to grasp quickly. Use these practical tips:
- Place your logo in the top third of the banner for best visibility.
- Use a single, clear line to explain what you do or the problem you solve.
- Pick a plain sans-serif font with strong color contrast for easy reading.
- Keep the lower part of the banner clear, since tables or people often block it.
- Put QR codes at eye level near staff to prompt interaction.
Freeman recommends using high-resolution images and graphics, checking colors, logos, and messages before sending files, and keeping key content away from trim, bleed, and hardware areas. These production steps help avoid blurry images, off-brand colors, cropped text, or content hidden by banner hardware. It’s also worth considering how furniture, monitors, and other booth items might block graphics.
How Many Banners Does a Booth Need?
The best number of banners is the fewest needed to make your booth readable from the aisle. For a standard 10x10 inline booth, two retractable banners or a tension fabric back wall with an extra stand are common setups. Freeman stresses that banners, fabric backdrops, hanging signs, and table graphics should work together as parts of a booth system, not as interchangeable products. The right mix supports different exhibit goals and booth environments, from brand visibility to immersive displays.
Event Rules and Banner Compliance
Trade shows and venues set rules for banners and hanging signs, including height limits, line-of-sight rules, flame-retardant certifications, and approval steps for overhead banners. Freeman notes that product templates include the sizes, specs, and guidelines needed to prepare artwork correctly, and warns that artwork mistakes can cause production delays, extra costs, and problems with the final print. Following fire-safety rules, accessibility needs, rigging limits, venue height restrictions, and approval steps must be checked in the official exhibitor manual or with event organizers, since these requirements differ by venue.
Banner Preparation Checklist
- Check booth size and event rules.
- Pick banner types and sizes that fit booth goals and the environment.
- Write a clear, single-line message for each banner.
- Review and approve design proofs, checking image quality, color accuracy, logos, messages, trim and bleed placement, and hardware clearances.
- Arrange rigging and get needed approvals for hanging signs, considering ceiling height and labor needs.
- Pack banners securely for transport and store them properly after the event.
Support from Event Platforms
Platforms like Map D help organizers and exhibitors by providing booth size details, banner and hanging sign rules, document upload tools for approvals, and services such as rigging or printed graphics packages. Freeman also suggests coordinating printed graphics with monitors and furnishings so one element doesn’t block another, and adding interactive content—like videos, product demos, and testimonials—to engage attendees and keep them in your booth longer.
Key Takeaways for Exhibitors
Retractable banner stands are usually about 33 inches wide and 80 inches tall. For a 10x10 inline booth, two retractable banners or a tension fabric back wall plus a stand are generally enough. Vinyl banners are sturdy and affordable but may glare under lights, while fabric banners are lighter and look more polished. Hanging banners are mostly for island booths and need approval and professional setup. Freeman’s advice highlights the need to review and confirm artwork as a final preproduction step to avoid production delays, extra costs, and issues with the finished print. For detailed specs and artwork guidelines, exhibitors should check the exact product template from their show contractor or graphics supplier (Freeman, Trade Show Graphics).