Table of Contents
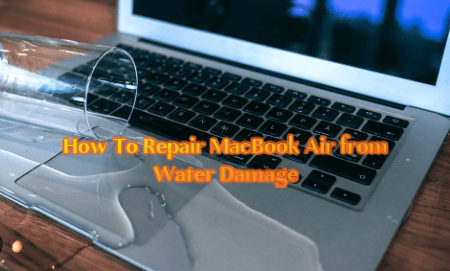
The most common cause of MacBook failure is getting liquid inside. Of course, people rarely take their laptops in the shower, but spilling coffee or water while working can be a frequent occurrence. And that’s not to mention cases when spilling water on a MacBook is the fault of children or coworkers. We’ll tell you what to do if a liquid is spilled on your laptop and how much water damage MacBook Air repair costs.
What happens if you spilled liquid on the laptop
The first thing that happens is that the minerals and salts in the water immediately corrode the device’s internal components. Any metal, silicone, and fiberglass parts are susceptible to this. At the same time, some metals oxidize and begin to rust. The presence of a power source that supplies electricity helps speed up the oxidation and corrosion process.
Copper and other metals actively migrate across the board, and this causes even more damage. You end up with an expensive, beautiful, useless case with non-working internal parts.
Warning Signs of MacBook Water Damage
After a liquid spill, many users assume their MacBook is fine if it powers on. However, subtle symptoms often indicate hidden internal corrosion. Watch for:
-
A flickering or dim screen
-
Delayed trackpad response
-
The keyboard registering incorrect keys
-
Unexpected shutdowns or restarts
-
Faint electrical buzzing or burning smells
-
A constantly running fan even under minimal use
These are early warning signs of internal moisture or oxidation affecting your MacBook Air’s logic board. Immediate inspection is advised before turning the laptop back on.
Apple’s Liquid Contact Indicators (LCIs)
Apple installs Liquid Contact Indicators (LCIs) inside MacBook devices to detect exposure to water or other fluids. These indicators turn red when triggered and are located near the logic board and connectors.
If your LCI has been activated, Apple considers it a Tier 4 non-warranty repair, even if no external signs of damage exist. This means you’ll be responsible for full service charges unless you have AppleCare+.
Understanding LCI placement is essential if you plan to check for internal damage yourself or if you are negotiating with Apple or a third-party technician.
Why Corrosion Happens Quickly
Water alone isn’t the main threat—it’s the minerals, salts, and electricity that accelerate corrosion. Once moisture interacts with a live circuit:
-
Copper migrates and damages internal pathways
-
Oxidation sets in within hours
-
The MacBook’s logic board and power IC become vulnerable
That’s why it’s critical to power down and disconnect the battery as early as possible. Attempting to use the MacBook while wet can cause irreversible motherboard failure.
Don’t Use Rice — Use the Right Drying Method
Despite popular belief, placing your MacBook in a bag of rice is ineffective. Rice does not absorb moisture trapped inside the ports, vents, or beneath the logic board. Worse, it can introduce dust or starch particles into the device.
Instead, follow these best practices:
-
Use silica gel packs or moisture-absorbing pouches
-
Place the MacBook upside down in a ventilated area for 48 to 72 hours
-
Avoid tilting the laptop excessively, which can spread the liquid
-
Never use a hairdryer or direct heat source—it can melt or warp sensitive components
Let your MacBook air dry naturally in a dry, temperature-stable space.
What If Your MacBook Still Doesn’t Power On?
If the MacBook does not respond after drying:
-
Do not attempt to charge it. Connecting power can short internal circuits.
-
Seek professional help from a certified repair technician.
-
For users worried about data loss, consider removing the internal SSD (if detachable) and accessing it via an external adapter.
-
Be aware that newer Apple silicon MacBooks often have soldered SSDs, which require advanced data recovery services.
Options like DriveSavers and SalvageData offer professional recovery from water-damaged MacBooks, even when they fail to boot.
INFORMATIVE TABLE
| Repair Scenario | Suggested Action |
|---|---|
| MacBook is on and exposed to water | Turn off immediately, unplug, disconnect peripherals |
| Signs of internal corrosion | Look for flickering, buzzing, fan spinning irregularly |
| Battery removable | Remove it. If not, disconnect the battery cable |
| Tools available | Open back cover, blot moisture, let components dry naturally |
| Tools not available | Tilt MacBook in tent position, wipe external moisture |
| Avoid | Turning on early, hair dryer, rice, shaking, over-tilting |
| Best drying method | Ventilated airflow in open room, 48-72 hours, silica gel nearby |
| Still not turning on | Seek professional diagnostics or Apple-certified repair |
| SSD intact but laptop dead | Use external SSD adapter to recover data |
| Cost from Apple (out-of-warranty) | $700–$1300 without AppleCare+ |
| Cost with AppleCare+ | $299 repair fee, only valid if purchased within 60 days of MacBook purchase |
| DIY repair cost estimate | $100–$400 (if parts needed, based on logic board or keyboard) |
| Component purchase platforms | Apple Self-Repair Program, AppleParts.io |
How much does it cost to repair a MacBook Air water damage at an Apple Service Center?
We can disappoint you if you’re hoping that the limited one-year warranty will cover your problem. Any, even minor liquid intrusion by Apple qualifies as a non-warranty incident. The company also labels such damage as “Tier 4.” This means that the MacBook Air water damage repair cost will be the highest. Depending on the model, the range is between $700 and $1300.
The price is affected by several factors:
- The age of your MacBook: the older the model, the more expensive the repair will be;
- The difficulty of repair: Apple devices cannot be called the best regarding maintainability. The more difficult it is to disassemble the gadget, the higher the repair cost.
Note that when repairing non-warranty cases, you pay a labor charge. This is an hourly fee, usually in the $100 range. Also, remember that your MacBook may be minimally damaged, and you’ll still pay the total price. That is, severe damage to the motherboard and a light cleaning of the keyboard will cost the same.
But let’s say you paid for the AppleCare+ program, which extends your warranty to three years and reduces the price of repairing “accidental” damage. In that case, the MacBook Air water damage repair service would cost you $299. That’s not counting the $199 you paid for your AppleCare+ subscription.
Unfortunately, using the extended warranty is not always available to users. You can buy AppleCare+ within 60 days of your device purchase. So your old Air can’t be connected to this program. But it’s not all bad. Even if the laptop is out of warranty, it can be saved.
How to repair MacBook Air water damage at home
So, your MacBook got liquid. This is always unpleasant, and you can get upset about it for a long time, but not now. Every second counts to save the laptop, so you have to turn the device off immediately.
To do this, press the shutdown key and hold it until the screen goes blank. Remember to disconnect the power cord to completely de-energize the gadget. Any connected accessories should be removed, as they may cause a short circuit.
Do not shake the MacBook to get all the water out as quickly as possible. You’ll spread the liquid over the motherboard faster and cause damage to other components. Next, you have two options available to you:
- If you don’t have the tools to open the cover, wipe all the liquid from the outside with a paper towel, and spread the MacBook. Lock it in the V position. This will allow the fluid to leak out through the ventilation holes. While this happens, you need to disconnect the battery, so it’s worth looking for a screwdriver.
- If tools are available, first disconnect the battery. On some models, you won’t be able to remove the battery, but you can disconnect the loop. If you need clarification on your actions, visit thematic sites for disassembly. After that, remove the excess liquid. If there is none, leave the device to dry out.
There are a few things you should not do under any circumstances. Do not dry the laptop with hot air, like a hair dryer. This will speed up the oxidation process and make your device even worse. In no case should you turn the device on or charge it. The truth is that even if the MacBook works, after a little while, it will finally break.
How to repair your MacBook Air at home after water damage
If you decide to repair the laptop yourself, prior preparation is essential. First, you need to download Apple’s official disassembly manual. It shows you detailed information on how to fix the components and what consumables you need.
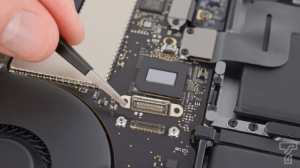
Then, you’ll need tools to disassemble and remove the parts. There are many good options online. Choose the one that best suits your needs. An ultrasonic cleaner is indispensable when it comes to water damage repair of MacBook Air. It removes corrosion well and does it without harming the components.
The process itself consists of several steps:
- Diagnostics. Any repair begins with an examination of what needs to be repaired. It is crucial to examine every corner of the motherboard and other components. Even if a small area is corroded, it disrupts the entire system.
- Eliminate the problems. Carefully remove badly damaged parts for further repair or replacement. To be sure of your actions, we advise watching videos and reading instructions on topical websites.
Consistent and careful handling will not harm your MacBook Air, and you can save a lot of money on repairs.
Also Read This: 10 Best Laptop for Writers and Bloggers
How much is water damage repair on MacBook Air: buying parts
If you have decided to repair your device on your own, you need to solve the main issue: buying spare parts. Of course, you need to find the original details, which can be done with the help of Apple.
The company has launched a self-repair program that officially allows you to buy parts. Moreover, it offers rental tools that will make replacement easier. Everything may seem significant at first sight, but the reality is different:
- The company has made it difficult to find parts for those who want to see the prices. You must complete the process of filling out serial numbers and other steps to get to the price. Some parts are very affordable ($39 for various keycap kits), and if you take the damaged part back to Apple, you’ll get a discount.
- As for the logic board replacement, the company will prevent you from upgrading to a higher-class model but encourage you to return the original damaged part. You will get a significant discount for that (about 85% in some cases). MacBook Air water damage repair costs $500–$700, depending on the model.
Not everyone will be satisfied with these terms. Especially since the program only applies to MacBooks with Apple processors. You can’t repair Intel-powered devices with parts purchased from the company. But you can buy MacBook Air parts at Appleparts.io.
The company provides a convenient service for purchasing parts for Apple devices. But the best part is that you can find genuine parts for machines manufactured 8 years ago. There is a variety of hard drives, displays, adapters, and even case components available.
The main advantage is that all parts are thoroughly tested before they go on sale. You can be sure that the components meet high-quality standards.
So, if your MacBook Air is in trouble, it doesn’t mean it’s over. You have plenty of options to save your laptop and extend its life for years. Follow our tips, and you will definitely succeed.


